Home -›
POS -› SetUp Instructions


🔑 Create an account, Sign in:
📝 Edit your Menu:
After submitting your details, SplitAbility asks for access to the Spreadsheets and Documents of the Google Account in order to copy a Menu Template spreadsheet to your Google Drive.
SplitAbility POS has been verified by Google as having the security requirements for accessing user data via OAuth.
Google's consent screen contains links to our:
Privacy Policy.
Terms of Service.
Account permission screen (OAuth 2.0).
After granting access, check for the menu template e.g. "ABC Restaurant" in your Google Drive folder "SplitAbility".
Edit this template with your own menu items. Alternatively make a copy or new file to edit your own menu data.
Spreadsheets menus are bulk uploaded into the POS.
Learn how to create / edit and upload menus.
Learn how to add modifiers.
Button Colors (optional) for the Menu Items can be any HTML Color shown here: SplitAbility Button Colors
Learn how to add button images (optional).
Learn how to add takeaway prices (optional).
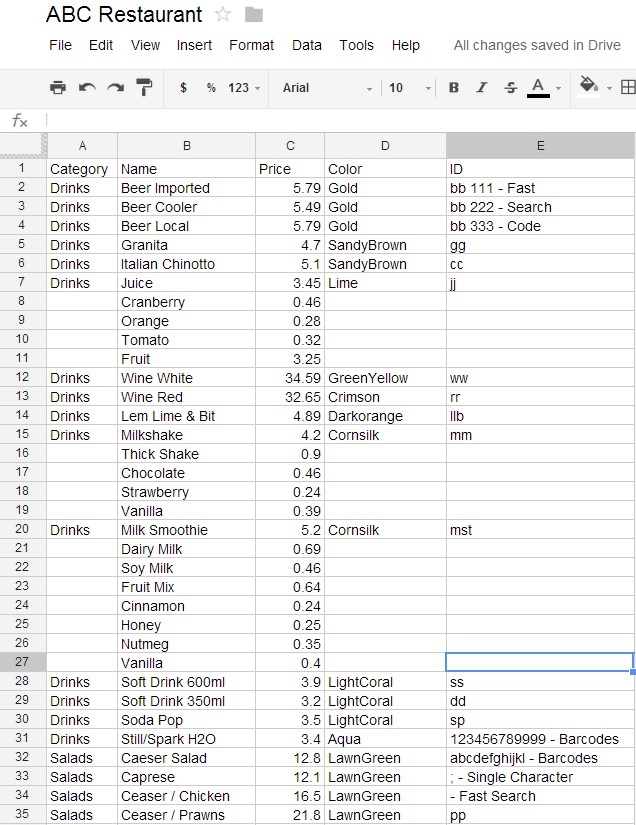
The "ID" column is optional and can be used for any purpose, popular uses include, Barcodes, QR codes, Universal Product Code (UPC), Price Look Up codes (PLU) or Unique Search Character/s. Unique Search Character/s are a powerful tool that enables fast entry with as little as one key stroke!
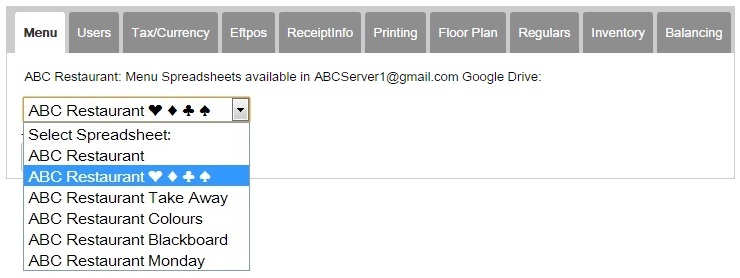
Update SplitAbility to use your new menu by selecting "Admin" then select the Menu from the dropdown list and finally the "Update Menu Data" button.
⚙ User Admin settings:
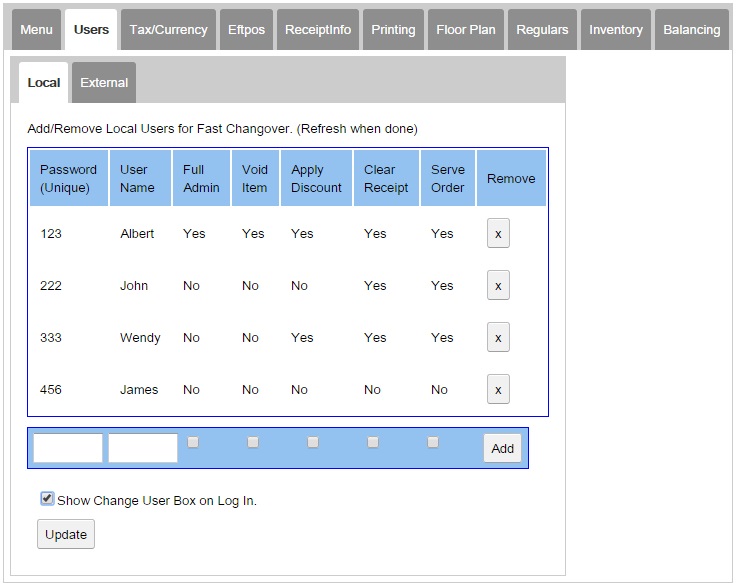
Add fast locking users (optional)
Learn more
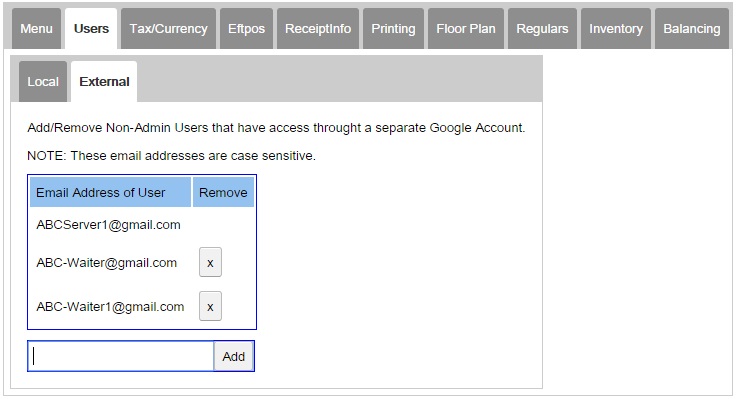
📲 Add external users (optional)
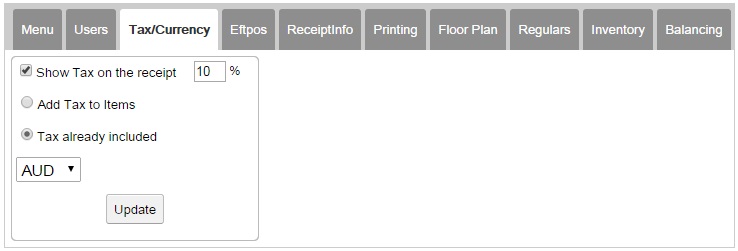
💱 Set the tax rate and currency (optional)
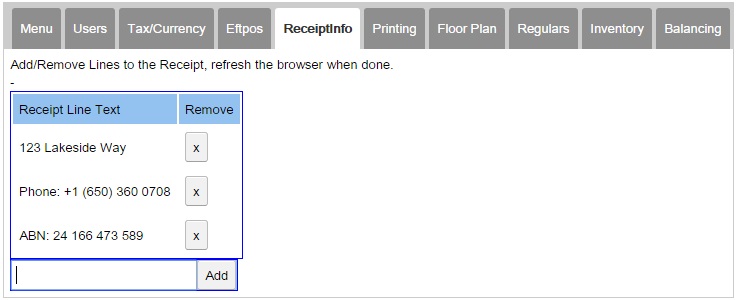
📜 Add receipt information (optional)
🖨 Set printing preferences (optional)
💳 Set up EFTPOS payment services (optional)
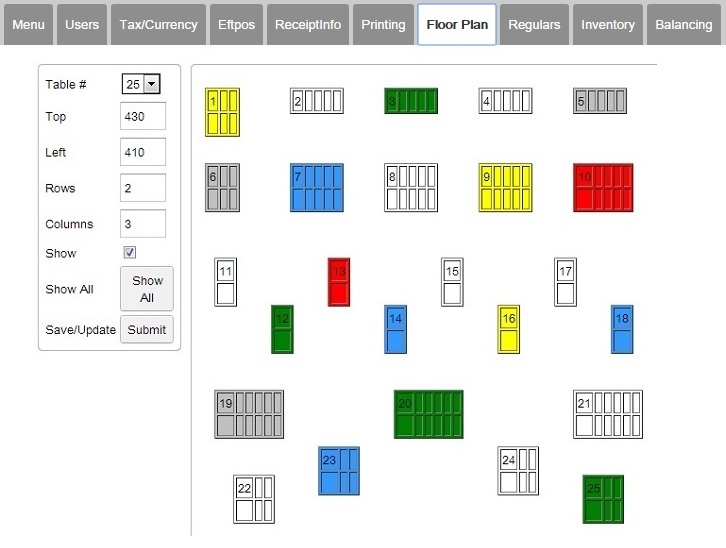
🏬 Adjust the floor plan (optional)
📞 Add regular customers (optional)

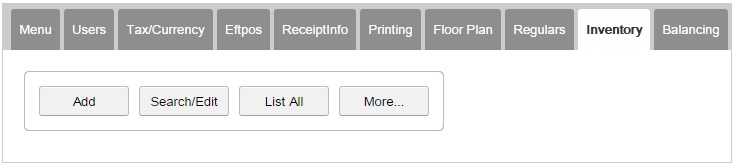
📈 Set Inventory Max/Min (optional)
Set Button Images (optional)
✅ You're good to go!

📑 Support
For detailed information see support.
Three simple steps:
🔑 Create an account, Sign in:
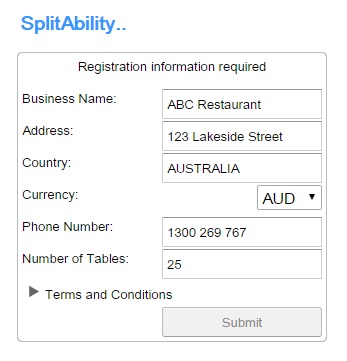
Registering to use SplitAbility requires a Google account for authentication (User ID & Password).
SplitAbility has been verified by Google to use data via OAuth. Learn more: Privacy Policy & Terms of Service.
SplitAbility also uses the Google Drive spreadsheet and document facilities in order to store and retrieve menu information as well as uploading daily transaction journals / balancing information / time management / inventory etc.
Note: During the registration process, SplitAbility asks for and requires access to the spreadsheets and documents of the associated Google Drive account, so if you are not sure about granting this access, simply create a new account that you are happy to grant SplitAbility read/write access to.
You may use an existing Google account, otherwise create a new or separate account here: Create a new Google Account. Either way, selecting "Sign In" from the menu bar above prompts you for all the required information.

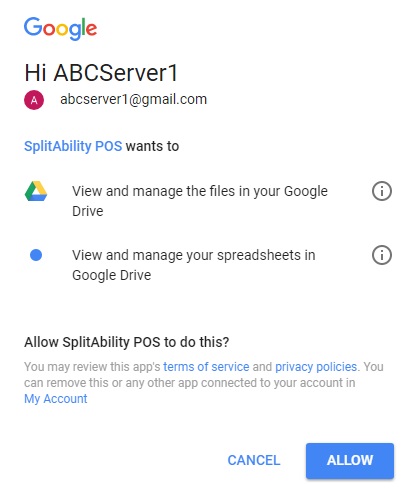
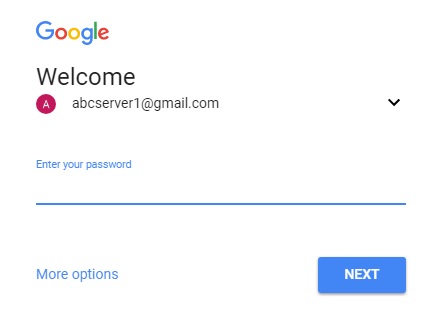
You'll be directed to a Google Accounts Sign in screen as show below.
📧 Register your details:
SplitAbility has been verified by Google to use data via OAuth. Learn more: Privacy Policy & Terms of Service.
SplitAbility also uses the Google Drive spreadsheet and document facilities in order to store and retrieve menu information as well as uploading daily transaction journals / balancing information / time management / inventory etc.
Note: During the registration process, SplitAbility asks for and requires access to the spreadsheets and documents of the associated Google Drive account, so if you are not sure about granting this access, simply create a new account that you are happy to grant SplitAbility read/write access to.
You may use an existing Google account, otherwise create a new or separate account here: Create a new Google Account. Either way, selecting "Sign In" from the menu bar above prompts you for all the required information.
You'll be directed to a Google Accounts Sign in screen as show below.
After submitting your details, SplitAbility asks for access to the Spreadsheets and Documents of the Google Account in order to copy a Menu Template spreadsheet to your Google Drive.
SplitAbility POS has been verified by Google as having the security requirements for accessing user data via OAuth.
Google's consent screen contains links to our:
Privacy Policy.
Terms of Service.
Account permission screen (OAuth 2.0).
After granting access, check for the menu template e.g. "ABC Restaurant" in your Google Drive folder "SplitAbility".
Edit this template with your own menu items. Alternatively make a copy or new file to edit your own menu data.
Spreadsheets menus are bulk uploaded into the POS.
Learn how to create / edit and upload menus.
Learn how to add modifiers.
Button Colors (optional) for the Menu Items can be any HTML Color shown here: SplitAbility Button Colors
Learn how to add button images (optional).
Learn how to add takeaway prices (optional).
The "ID" column is optional and can be used for any purpose, popular uses include, Barcodes, QR codes, Universal Product Code (UPC), Price Look Up codes (PLU) or Unique Search Character/s. Unique Search Character/s are a powerful tool that enables fast entry with as little as one key stroke!
Update SplitAbility to use your new menu by selecting "Admin" then select the Menu from the dropdown list and finally the "Update Menu Data" button.

Add fast locking users (optional)
Learn more

📲 Add external users (optional)

💱 Set the tax rate and currency (optional)

📜 Add receipt information (optional)

🖨 Set printing preferences (optional)
💳 Set up EFTPOS payment services (optional)
🏬 Adjust the floor plan (optional)

📞 Add regular customers (optional)
Regular customers can be added on the fly during normal operation of the POS.

📈 Set Inventory Max/Min (optional)
Inventory item count is automatic, set the mode to either count up (increment) or count down (decrement).
Item count can be reset or edited at any time.
Item count can be reset or edited at any time.

Set Button Images (optional)
📑 Support
For detailed information see support.