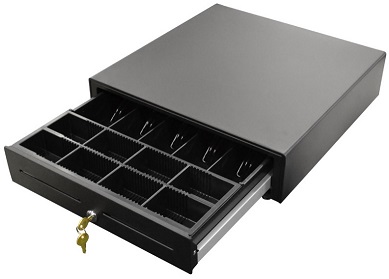
Overview:

|
Standard Cash Drawer - 5 Note/8 Coin. |
If you haven't purchased one yet, here are some considerations:
- Aesthetics - color, sizes, styles etc.
- Do you need mounting brackets for below the counter positioning.
- Heavy duty drawers have steel ball bearing slides for greater durability.
- Compatibility e.g. 24V or 12V and does it match the receipt printer.
- Till configuration e.g. 5 note / 8 coin or 4 note / 4 coin.
- Media slots at the front are handy for credit card receipts i.e. no need to open the drawer.
- Removable till tray - 5 note / 8 coin.
- RJ12 kick out connector (24 volt solenoid standard).
- 3 Position Key Lock.
Connecting to the printer:
SplitAbility works best with intelligent printers as they do not require any software or device drivers to operate.
The cash drawer can be operated from any device running the POS.
Connect the cash drawer to the printer by plugging the RJ12 connector cable into the back of the printer, the connector looks similar to a phone line connector.
The cash drawer can be operated from any device running the POS.
Connect the cash drawer to the printer by plugging the RJ12 connector cable into the back of the printer, the connector looks similar to a phone line connector.
POS Settings:
Printer and cash drawer set up is done in the "Admin" -› "Printing" section.
Set the POS to open the cash drawer by checking "Cash Drawer:

Set the POS to open the cash drawer by checking "Cash Drawer:

Managing the cash drawer:
The drawer opens automatically on hitting the "Cash Tendered" button on the POS or manually if you have the key.
See balancing totals for details on how to manage the balancing.
Includes details on managing the cash drawer totals, float management and closing off.
See balancing totals for details on how to manage the balancing.
Includes details on managing the cash drawer totals, float management and closing off.